Big brows are in and microblading is all the rage – you get to fake good eyebrows, with none of the work and all of the benefits! Who doesn’t want to wake up with perfect eyebrows every day?
But professional microblading can be an expensive procedure to have, and it looks simple enough – how hard can it be, right?
That’s exactly what everyone else thought, too, which gave way to the newest trend: DIY microblading.
A lot of ladies have taken to (semi) permanently tattooing their own eyebrows, and even creating tutorials for it. They make it look easy, but is it, really? How do you do it, and what kind of risks are involved? Let’s take a look at everything you need to know about DIY microblading.
What is microblading?
You are most likely already familiar with microblading, but just in case, let’s run over the basics again.
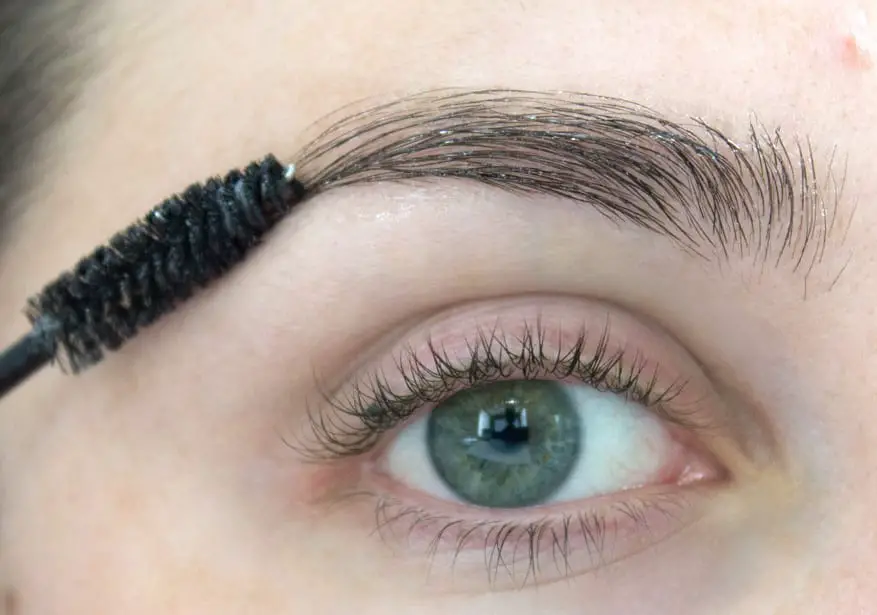
Microblading is a cosmetic procedure that is performed on your eyebrows. It’s a type of manual, high-precision, semi-permanent tattooing, but instead of a tattoo gun, the technician uses tiny needles or blades to recreate the look of eyebrow hairs.
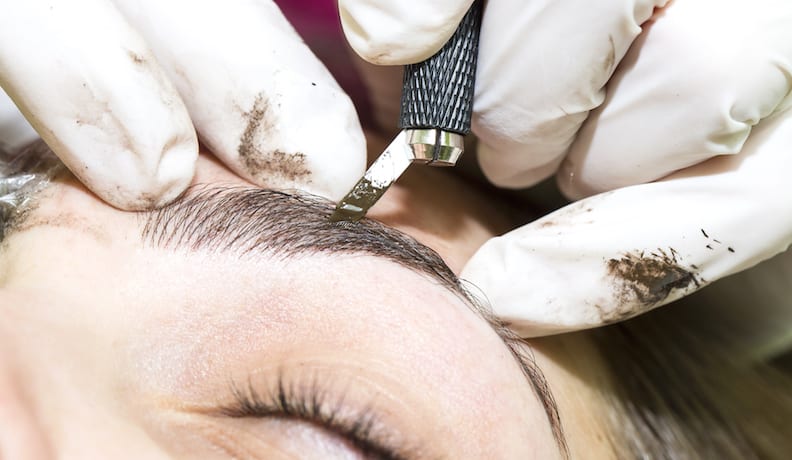 Image courtesy of HelloGiggles
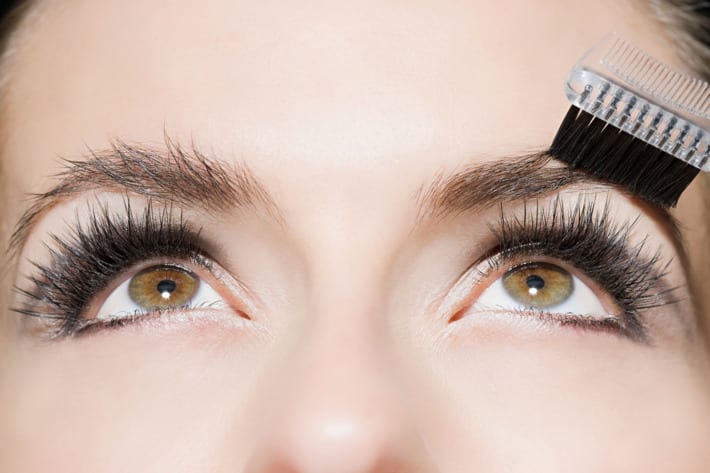
The point of the procedures is to achieve a low-maintenance, fuss-free, long-term eyebrow look that is full and natural.
Since it is a type of tattoo, microblading hurts, and it comes with the normal healing process you can expect from a tattoo. If you’ve never gotten tattooed or microbladed before, we’ll have a section towards the end of the article where we’ll detail what you can expect in terms of aftermath and after care.
The good news and bad news, at the same time, is that microblading does fade eventually. That’s great if you don’t love the results, but annoying if you want to maintain the look.
Is DIY microblading possible?
Real talk – microblading can be an expensive procedure, especially since it needs to be repeated after some time.
Naturally, women have started wondering whether they can perform the same procedure at home and obtain the same results. Is DIY microblading possible?
The answer is yes, but it is not necessarily recommended.
It is not only a fairly involved procedure to do on yourself, it also has the added disadvantage of being semi-permanent, meaning that if you mess up, you’re sort of stuck with it until it fades. It’s not exactly like that time you thought you could go blonde at home.
Just think about your worst eyebrow days…and then imagine being stuck with that for months. If you can handle that kind of risk, then read on for the nitty gritty of DIY microblading. If not, go to a professional.
With that precaution given, it is possible to do DIY microblading at home. You just need to be aware of the risks involved. What are they? Here’s what you should be aware of before you reach for the numbing cream…
You most likely don’t have the right technique
That training aestheticians go through isn’t for nothing – a procedure like this requires a bit of studying and practicing before you can confidently do it the right way.
Having the right technique is incredibly important, because otherwise – and there is no nice way to say this – you might end up messing up your eyebrows. And you really don’t want to wait years for your handiwork to fade or be forced to get bangs.
Your hand may not be steady enough
Listen, this procedure is about precision, more than anything else. You are etching tiny little strokes into your skin, with a needle, and they need to successfully simulate eyebrow hairs.
You’ve got to be aware of size, placement, how much pressure you put on each stroke, and how you’re drawing the eyebrow hairs.
That’s a lot to do on yourself, and you may discover (too late) that your hand isn’t nearly steady enough for this. By that point, you’ve already created some crooked eyebrow hairs that you’re not exactly happy with. Be aware of the precision required.
It hurts too much to do it on yourself
At the end of the day, this is still a tattoo, and it’s done using needles. That means it’s going to hurt.
However, there’s something to note here, as well – if you watch some of the YouTube videos people have made about DIY microblading, some of them report a burning sensation that occurs while they’re doing it.
But trained professionals are saying that with the right technique, that shouldn’t be an issue. If it does burn, chances are you’re applying too much pressure and going deeper than you actually need to.
That area of skin can get infected
This one is a biggie. You see, when you receive training for microblading, you also receive the hygiene training and know how to properly sanitize your tools and do the procedure in a sanitary manner.
However, if you do it at home, you don’t benefit from the same kind of training, and if you forego the hygiene component, you can get an unpleasant surprise when the skin in that area becomes infected, and you need to treat it or seek medical attention.
That can also mess up the work you’ve done on the eyebrow and the final result.
You can end up with long-term scarring
Remember when we talked about going too deep into the skin? When you work on it, you only need to penetrate until the upper dermal layer. That way, the ink will stay put and won’t bleed out, but you won’t get scarring, either.
If, however, you cut too deeply – into the hypodermal layer – then that can spell trouble. Not only will it cut your skin badly and it will hurt, but it can also create scarring and even lead to infections.
You need the right tool, and that’s what we’re going to talk about in this next section.
How To: DIY Microblading
If you’ve decided that you are well-informed and confident and you want to go ahead and do it, then we need to say two things:
- You are very brave, and
- Here is what you need:
- Surgical gloves
- Cotton swabs
- Rubbing alcohol
- Microblading tool – get the best one here
- Pigment – get the best one here
- Numbing cream – get the best one here
- Stencils – get the best one here
Of course, you can always get yourself a pre-bundled DIY microblading kit but whereas that can be a cheaper option, you don’t get the luxury of choosing the best supplies for yourself. And we say, if you’re going to do this, it should be done right.
Tip: We also highly recommend you get yourself some practice skins to perfect your stroke on.
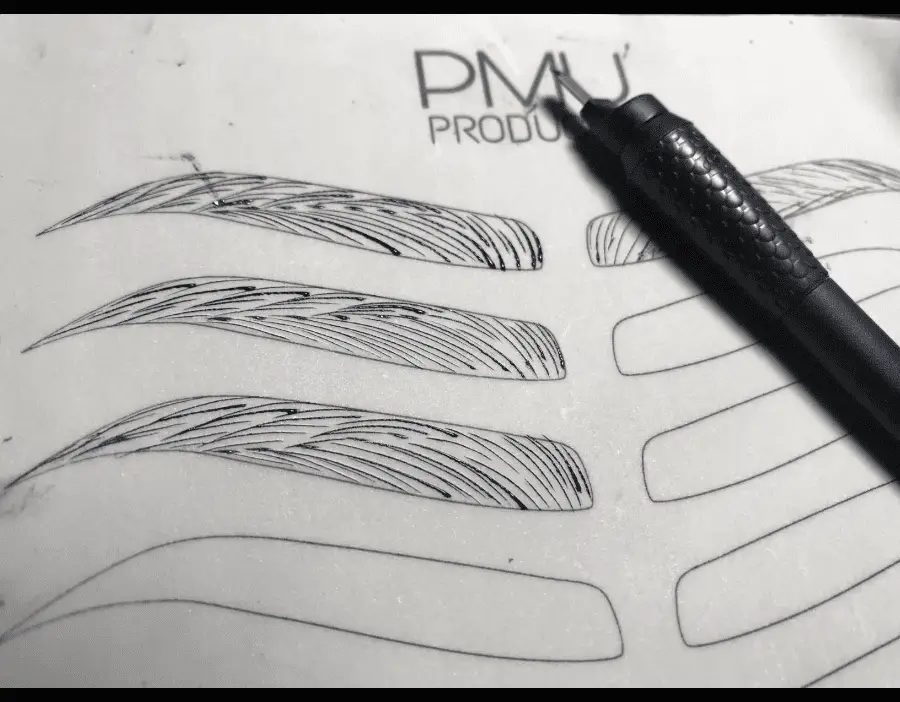
After all, you really don’t want to be using your own skin for your first run!
Step 1 – Stencil out the shape you want
The very first step is to draw the shape you want and the eyebrow hairs. That gives you something to work off of when you’re using your tool.
This step is essential, because it ensures that you have your base covered and something to follow. The last thing you want is to start free-handing your eyebrow design.
Remember that this will be on your face for the next 1 to 3 years, so make sure you have your shape perfected. If you have to wipe it off and start again several times, that’s alright. You just need to make sure you end up with something you’re happy with.
An easy, fuss-free way to do this is to get yourself an eyebrow shaping stencil kit. This way you can try on shapes and get a flawless outline every time.
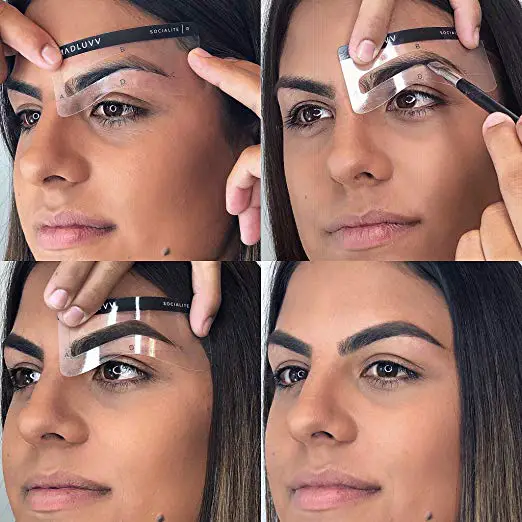
Once you look in the mirror and love what you see, you can move on to actually beginning the process.
Step 2 – Apply numbing cream
Since this is still a type of tattooing and there are sharp needles and blades involved, you’ll want to apply some numbing cream to minimize any pain you may feel.
No matter how tough you think you are, numbing cream can help. Especially since you’re doing this on yourself, you need to make it as comfortable as possible.
Remember that you need to wait a bit for the cream to be effective before you can start the actual microblading process.
Step 3 – Pick out your colors
While you’re waiting for the numbing cream to act, take the time to pick out your pigments.
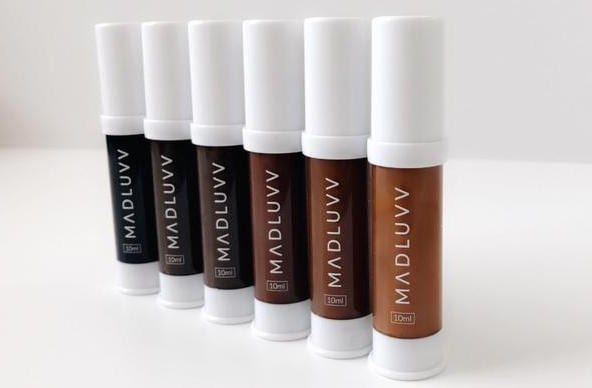
You may use one color if you think you’ve found the perfect shade, but more often than not, a natural look is achieved when you use at least two different shades – a lighter one and a darker one.
The microbladed bits will blend together with your natural brows more seamlessly this way. Remember that the pigment will look much darker than it actually turns out in the end, so don’t worry about it looking crazy.
Step 4 – Sanitize your tools
Hygiene is no joke, so this is an incredibly important step: sanitize your tools. Since you’re doing this yourself, in your home, you have to take the same steps as technicians would at a salon, so start by sanitizing your tools.
Rubbing alcohol should be enough to ensure proper sanitation for the actual needles or blade you are using. You’ll also want to clean the area you’re working on with alcohol.
Step 5 – Put your gloves on
Again – sanitation! Before you start working on anything or touching anything, put your gloves on.
Microblading can get messy and you don’t want infections penetrating this vulnerable area of skin while you’re working on it. Make sure you also have cotton swabs handy, so you can clean up sanitarily whenever you need to.
Step 6 – Start tracing the eyebrow hairs according to your stencil
Time for the scary – but exciting – part! You can now pick up your tool and actually start applying pigment to the skin. More than anything, you need to be careful, and attentive.
You know how when you were a kid you were always told to color within the lines? That kind of precision is more important than ever before. So, put all that practice to good use and trace those lines by following your stencil carefully.
Have patience and don’t rush this process – microblading is done one hair at a time, so you have to have good eyesight, preferably some sort of visual enhancement device, and a steady hand. If you rush it, the results won’t be as clean and natural-looking as you want them to be.
Remember that you want each line to be as delicate as possible, because you are trying to mimic real hair. If you draw thick eyebrow hairs, your eyebrows won’t look fuller, they’ll just look more fake. You want numerous thin little hairs, instead.
DIY Microblading Aftercare
Just like with tattoos, there is some aftercare involved. The area that you worked on will be red and swollen, and truthfully, your eyebrows will look a little bit crazy for a couple of weeks afterwards, while the pigment settles.
They will look much darker and thicker than they do when the healing process is over, so don’t panic if you look like Groucho Marx. Your eyebrows will look normal in a few days.
Here are some of the things you should avoid for 10 full days, for best results:
- Don’t wash your eyebrows – water is a no-no, so the same goes for rain, steam, etc. No steam rooms or swimming pools, either.
- Don’t touch your eyebrows – you’ll be tempted to poke at the tender skin or the scabs, but that’s an infection risk. Better to leave them alone.
- Don’t put oil on your eyebrows – the same cleanliness concerns apply.
- Don’t allow sweat to drip on your eyebrows – sweat is salty and dirty and you wouldn’t want it dripping into a wound, so try to keep your forehead dry.
- Don’t expose your eyebrows to the sun – going sunbathing during aftercare is not the best idea.
- Don’t use makeup on them – surely this is obvious, but we’ll say it anyway – don’t use makeup on them over this period; they’re too tender for the products, remover, and the friction necessary to take off the makeup.
- Try to keep your hair off them – again, keep them as clean and as protected as possible, with minimal touching.
Again, just like with tattoos, you need to protect the area and try not to aggravate it too much. At the end of the day, it’s a wound, so it’s bound to need some care, so just baby your eyebrows as much as possible in the first week or so.
You can also expect scabbing to form, and what we’d like to ask you is to please leave it alone.
Try not to scratch at the area and don’t try to poke or remove the scabs, because you may inadvertently remove some of that pigment you’ve put in. You don’t want to ruin all that work you put in. You didn’t suffer for nothing!
That’s it! As you can see, DIY microblading is certainly possible, it just involves a lot of studying, a lot of preparation, some risks, and a lot of care.
Whether or not that offsets the cost of getting your brows professionally is up to you to decide.
nice and awesome article about microblading thanks for sharing