Looking to try your hand at a DIY lash lift kit? Join the club. Long, luscious lashes are lovely, and they are having a big moment right now.
Between falsies, extreme mascara looks, and extensions, it’s obvious that lash enhancement is definitely having a moment – and we think it’s here to stay.
But the cost and maintenance of falsies or extensions can be too much for many lash loving beauties. And so you’re here, looking for an alternative that enhances your natural lashes: a lash lift.
Our Top Pick: ICONSIGN Lash Lift Kit:
This lash perm kit promises professional-level results with their product, and it certainly looks the part! It doesn’t only look cute; it actually works, and even gives you some handy instructions on how to perform the lash lift.
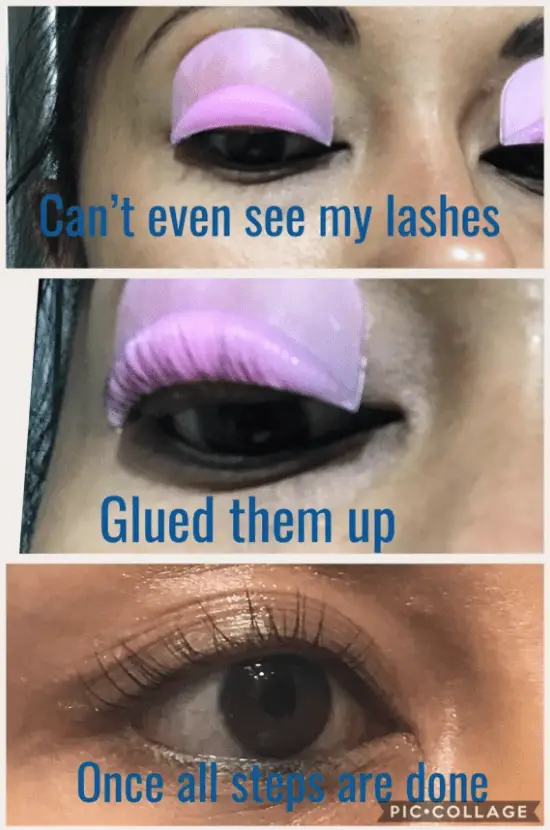
How You Use It: Like the above lash lift kits, this Vassoul’s Lash Lift kit comes with all the tools you need. You use the included lift pads first (there are 5 pairs included, of various sizes so you can really customize the level of curl you want) to glue your lashes on and curl your lashes upwards.
The perming solution is to be used first, followed by the fixing solution. Once you leave those on for the appropriate amount of time, you use the nourishing solution and the cleansing solution. Easy peasy.
What’s Great About It: At first glance, this lash lift kit seems pretty indistinguishable from the others but it does have two very important advantages.
The first is that the solution is effective but also less irritating so if you have sensitive eyes, this is the lash lift kit for you.
Another huge perk of this DIY lash lift kit is that the eye pads that you glue your lashes to are very easy to use. They stick better to lashes so you don’t have to struggle away, trying to fix lashes to the pads before curling them.
The glue is also fast drying which makes the whole curling process easier since it gives stray, rebellious lashes less time to fall away from the pads before you start curling them.
Lastly, this lash lift is a high-quality kit decked out with everything you need, so that’s another big plus, here.
And best of all? It also comes at the lowest price of the three, so if you’re budget-conscious, this may be for you.
Like the other ones, the little bottles are clearly labeled and you get multiple uses out of the kit (up to 15!).
Done right, a lash lift can make your lashes look every bit as good as extensions do.
Overall verdict: Reviewers are almost unanimously happy with the kit, and the results they’ve obtained speak for themselves. The kit works, and it comes at an affordable price, so it’s a very attractive option.
This one offers a lot of value for money and comes with multiples of each product in the kit. They say you can use it up to 15 times, and that makes it a really good deal, especially compared to salon prices.
What Is A Lash Lift?
Lash lifts, lash perms, or LVL all refer to a professional procedure where your natural eyelashes are chemically curled and “lifted”, and sometimes also tinted.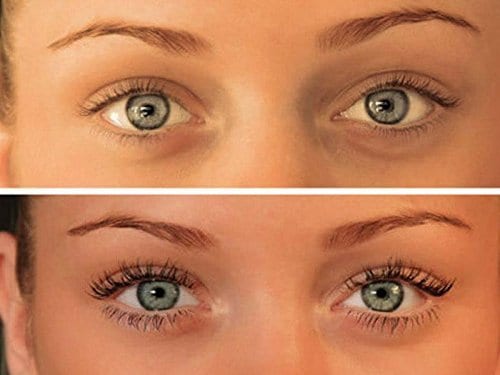
This procedure is not permanent, but the effects can last for around 2 to 3 months. So you’ll get a lot of time with your new, wonderful lashes.
The main advantage of a lash lift is that you don’t need to do anything to maintain it, unlike eyelash extensions, for example.
It’s a one-time procedure that doesn’t require curling, glue, everyday combing, or even mascara if you don’t want to.
It’s a very low-effort and low-maintenance solution for those who want luscious lashes without the care that goes with them.
How Does The Process Work?
If you’re going for a professional lash lift, the very first step is a mini consultation with your technician, where they’ll ask you some questions about your routine, lash type, and preferences, in order to determine what kind of curl to give you.
This can include questions related to how often you wear mascara, what lash look you prefer, if you like an extreme curl or a softer one, if you have straight, stubborn lashes, etc.
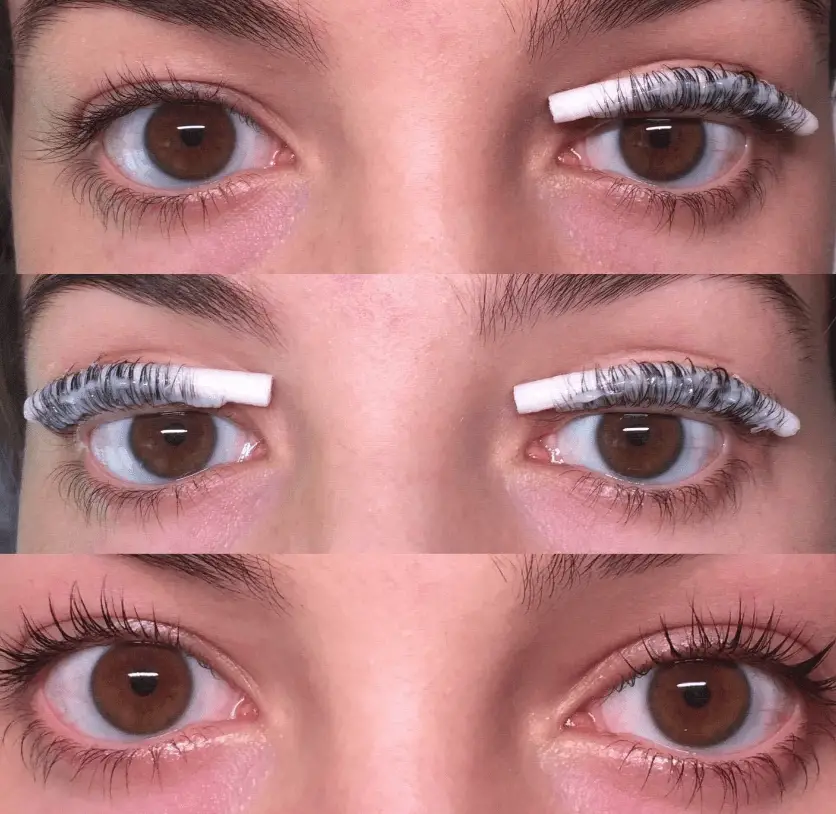
Once that’s done, they will pick a curl size and start cleansing your lashes. Then, they will be separated, and a shield will be placed on your under-eye area to protect it and to get your lower lashes out of the way.
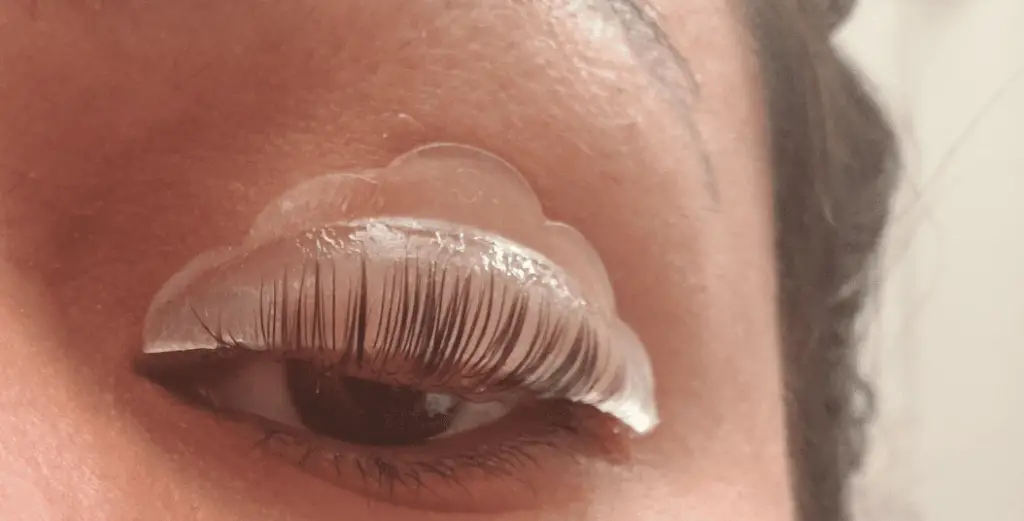
A silicone shield will be lightly glued on your top eyelids, and a rod will be placed along your lashline. This is what determines the size and the type of curl – the rod is smaller or larger, tapering or not, depending on the curl you want to achieve at the end.
Then, your lashes are combed over it and they are covered in the perming solution. Yes, just like the way you perm your hair, this essentially “perms” your lashes by fixing them into place in that curled position.
The perming solution is left on your lashes from 5-6 to 10-12 minutes, depending on your lash type – thicker or thinner, easy to curl or more straight and stubborn, etc.
A setting solution is added on top, as well as oil, to fix the shape, and nourish the lashes, respectively. Altogether, the treatment takes around an hour to complete.
How Much Does a Lash Lift Cost?
As with all cosmetic treatments like this, the price will vary depending on your location, the salon, on the level of experience and the skill of the technician, etc.
However, the price is lower than on lash extensions, and you can expect anywhere around $75 to $100 or in more expensive cities, $150.
That’s really pricey, you say. Yea, we feel you. This is why so many people are opting to do a DIY lash lift at home. The prices are much, much cheaper and with the help of one of the best lash lift kits, you can get salon-quality results at home.
What is a DIY Lash Lift?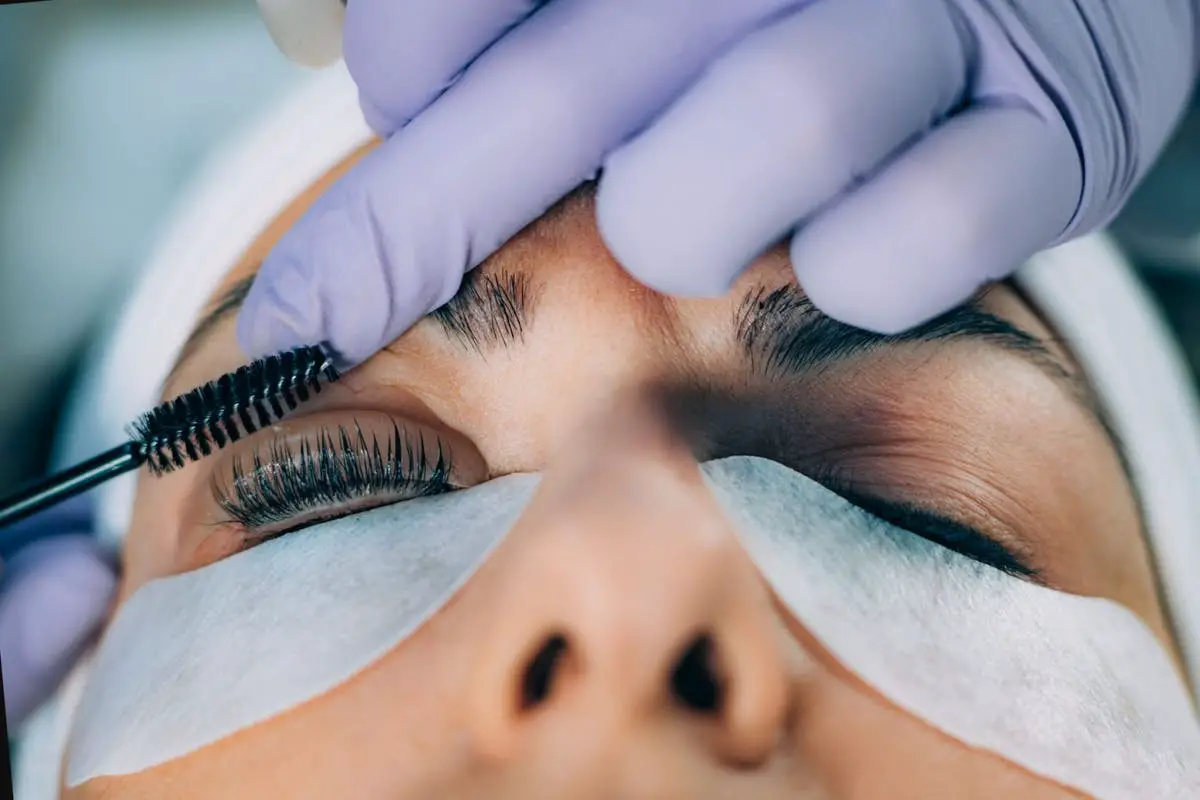
As you can probably guess, a DIY lash lift is a lash lift you do yourself, in the comfort of your own home.
The procedure is the same, but instead of having a technician do it for you at a salon, you do it on yourself at home, or you have someone else do it for you. This is a case when it’s nice to have a lash lovin’ roomie.
But if the thought of doing a lash lift at home is intimidating – you have good reason to be a little wary. There’s definitely a learning curve to perfecting the DIY lash lift. So it’s not for those who are looking for a quick and easy solution.
Even the best lash lift kits can be confusing for the first time DIY-er and the instructions can be difficult to wrap your head around. So if you decide to go this route, be ready to try, try and try again until you get the hang of it, and watch a YouTube video or two to see exactly how it’s done.
That being said, the best lash lift kits are made to be used at home and come with materials that are pretty forgiving to mistakes – i.e. not as harsh as you’d get in a salon – so you will be able to practice until you get it right.
And once you do get the hang of it, well, you now have the skills to give yourself a DIY lash lift over and over again. Be prepared to never use your eyelash curler again!
The Pros & Cons Of DIY Lash Lifts:
As with anything else in life, there are advantages and some drawbacks to this kind of procedure, so let’s take a look at both sides and see where we end up.
Let’s start with the positives, shall we?
What are the Pros of a DIY Lash Lift?
It costs less
The main reason why people look into DIY-ing is that it saves them money, and who doesn’t want to save some cash?
With professional lash lifts sitting at around $100 every 2 to 3 months, that’s $400-$600 per year spent on lash lifts. Think of how much you could save by doing it yourself.
You don’t waste time/effort at the salon:
And then there’s the time and the general bother of dragging yourself down to the salon. It’s true this is a low-maintenance procedure, but you still need to go back every few weeks to get your lashes done, and if you live somewhere remote, or your local salons don’t offer this service, then it’s even more of a pain. Doing it at home saves you all the hassle!
You get complete control over the process:
You know when you go to the salon and pay for a service, but you’re dissatisfied with the way it’s been performed?
Whether they use the wrong type of curl for your lashes, or the curl doesn’t last as long as you want to, the point is that you are not happy.
That’s why doing it yourself allows you that control; if you want something done right, you have to do it yourself.
Of course, DIY lash lifts aren’t all luscious lashes and unicorns. There are downsides as well…
What are the Cons of a DIY Lash Lift?
It comes with risks:
The biggest drawback with this kind of thing is that it can be risky. Because this is a strong chemical solution that goes near your eyes, any false move can mean that you are potentially damaging your eyes. That’s scary.
You may still need a second pair of hands:
Chances are that you won’t be able to complete the process 100% on your own, so you need a friend to help you, anyway.
Especially because the work is so precise, you’d really benefit from having someone apply the perming solution for you. So, it sort of defeats the purpose, a little bit.
You may not do it right, because you’re not a trained professional:
Have you considered that you may actually not complete the process the way you’re supposed to, because you are not properly trained for it? If you make a mistake, even if you don’t damage your eyesight, your eyelashes might be wonky for around 8 weeks, which is just unfortunate.
What are the Best Lash Lift Kits?
Ready to try your hand at a lash lift at home?
Lucky for you, DIY extraordinaire, there are many lash lift kits on the market to choose from.
That being said, the vast majority of them are sloppily equipped or contain supplies that are simply not effective.
This is why we’ve narrowed the field of them down to the top 3 lash lift kits. Choose from these select products and you can’t go wrong.
Dolly’s Eye Lash Wave Lotion Kit:
This kit from Dolly’s Eye Lash equips you with everything you need for an at-home lash lift. Every bottle is clearly labeled, so you know which steps to do when and what lotion to use to ensure success. This is one of the most beginner-friendly lash lift kits you can get your hands lashes on.
How You Use It: You get two different sizes of silicone pads that you glue your lashes to – the different sizes are for the level of curl you want, with the medium pads giving a sharper curve and the large pads providing a more gradual curve.
After your lashes are prepped onto the silicone pads, you then use the perming lotion, followed by the setting lotion, and finally, the nourishing solution.
What’s Great About It: This is the most expensive pick on our list, but it’s certainly justified because the quality is there and it’s so easy to use, that you won’t even feel like you’re DIY-ing it.
It helps that each step is numbered, so you can’t mess up the order. The two different sizes for the silicone pads are also a nice bonus, although other more affordable kits offer even more.
But all in all, even the newest newbie can actually use this lash lift kit, which is why it’s one of our favorites to do at home.
Another we love about this lash lift kit is that it works. As in, it’s capable of providing a dramatic and noticeable lash lift on even the thickest, most stubborn of lashes.
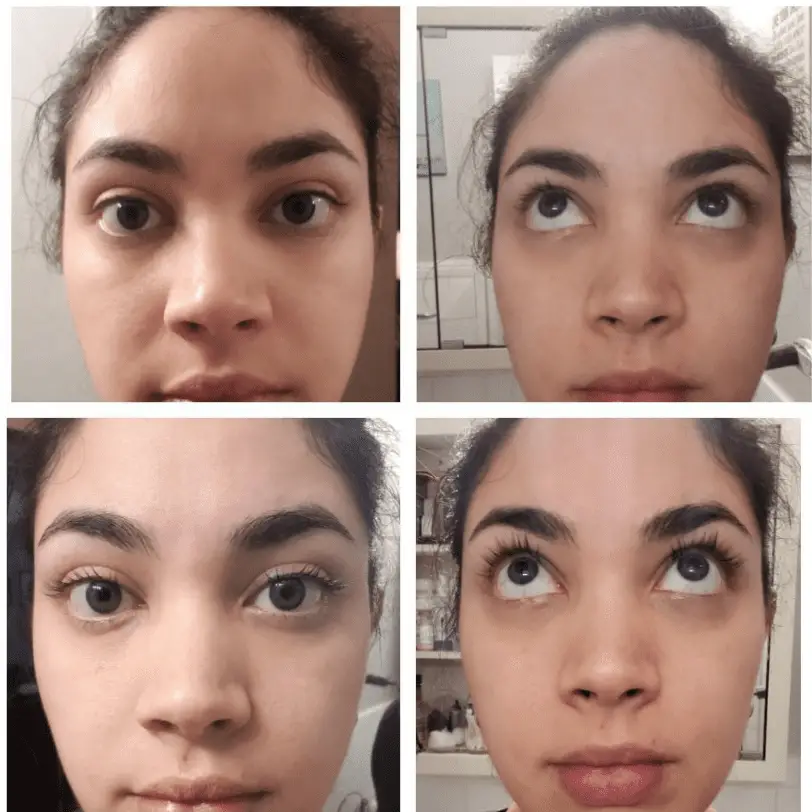
So if you’ve been disappointed by eyelash curlers and had no luck with even heated lash curlers – expect to be very, very pleasantly surprised with this lash lift kit!
Overall verdict: This is one of the most popular DIY lash lift kits, and everyone is pretty impressed – and so are we!
Dolly’s Lash Kit makes it super easy for even inexperienced beauty noobs to do an impressive lash lift at home at a fraction of what it’d cost in salons.
The results are impressive, even on stubborn lashes and you’ll probably get around half a dozen lash lifts with one kit, making it even more cost-effective.
The only drawback is that there are no instructions included in the kit, which can be annoying, but you can always go online for that.
On the other hand, the learning curve is not steep, so with practice, you could even do both eyes in as little as 45 minutes. Overall, one of the best lash lift kits around!
AYASAL Lash Lift Kit:
Ayasal’s Lash Lift Kit is one of the most popular DIY lash lift kits on the market. And it’s no surprise why – this kit works. That being said, it’s not the easiest lash lift kit to use for absolute beginners. Here’s what you can expect from this kit!
How You Use It: This kit includes a complete collection of everything you need to use, including the pads and the glue to fix your lashes into position.
The trickiest part is getting your lashes glued onto the pads but once you get that down, the rest is a breeze.
The rest of the process is applying the perming solution, and then the fixing solution comes second, followed by the nutrition serum. The cleanser is the final step. The kit even includes cleaning tools.
The process is very similar to professional lash lifts and to the other DIY products, and it’s overall really easy to use, especially once you get the hang of it.
But as mentioned, getting the lashes to stick to the pad is going to take a while especially at first so make sure you have plenty of time for your first run.
Or you can opt to use the rods instead of the pads to glue your lashes to – that might even provide a more dramatic curl.
Also, as easy as this kit is to use – the instructions provided aren’t clear. This is where YouTube tutorials really come in handy.
What’s Great About It: Like the set before it, what’s really convenient about this is that it includes everything you need (well, minus the lashes), and they are all numbered and labeled very clearly.
This one is also almost half the price of the Dolly’s Eye Lash set, so it offers excellent value for money, especially since you get enough to lift 5 to 10 times.
Overall verdict: This lash lift kit is one of the best out there with overwhelmingly positive reviews to back it up, echoing what we knew already – this thing works!
Like with all sets, it takes some getting used to and some learning, but once you get the hang of it, it’s all smooth sailing.
How Do You Do A Lash Lift At Home?
Now that you’ve got one of the best lash lift kits on the market, you want to know how to do a lash lift at home.
As we mentioned previously, there isn’t much difference between doing a lash lift at home and getting it done professionally as far as the process goes. Your DIY lash lift kit should contain the perming solution and the glue, as well as the silicone pads you need.
We also recommend you get some useful supplies together beforehand like:
- Cotton swabs. Helpful to use to secure lashes to the pads instead of your fingers.
- Saran wrap. A little bit of saran wrap can go a long way to adhere your lashes in place after you’ve secured them to the pad and applied glue.
- Saline solution. Great to have on hand to rinse your eyes out just in case any glue gets in your eyes.
- Vaseline. It can be difficult getting the glue off and Vaseline certainly helps to do just that.
Once you’ve got all your tools, you’ll need to do it one eye at a time, if you’re doing it alone.
In fact, we’d advise that you don’t try to do a lift on yourself, especially if you’re a newbie, and have someone give you a helping hand. When you do it yourself, it becomes increasingly difficult to do it with just one eye open and glue your lashes to the pad properly and separated.
You go through the same process of cleansing, gluing your lashes to the pad, separating them and combining them, and then applying the perming solution (at the root only! Applying it towards the tips can over-process your lashes).
It can be done, it just takes a lot of skill, dexterity, attention to detail, and patience. Regardless, the perm should last you about 8 weeks, just like a normal one does.
Why Avoid DIY Lash Lift?
Most of you might be aware of the term perm. Yes, lash lift is the perm for your lashes. So to put it in simple terms, you first get an appointment with a certified lash technician.
This professional at the salon will do the rest. You need to lie down and keep your eyes closed all the time. To ensure your upper eyelid stays put, 2 things are used.
A curling rod affixed to the upper eyelid and a silicone pad with a light adhesive. This sloped shaped silicone pad also serves as a guard and base for the eyelashes. So the lashes curve to sheer perfection when smeared in perming lotion.
This silicone pad has various sizes. So the length of your lashes determines which pad is suitable for you. Next, the technician does her job by brushing the lashes backward.
Now, this all may sound a bit overwhelming and complicated. This is another major cause why women indulge in getting it done by themselves at home. Also, DIY methods seem to be more appealing, exciting, and less costly.
But the fact is, it is quite intimidating, and professionals advise women to not do this. Even Ginger King; a cosmetic chemist said something about the lash lift. The Icon Sign Official Lift Kit comes with ingredients like methylparaben and propylene glycol.
Even though these are the allowed ingredients for cosmetics. But if they come in contact with the eyes, may irritate. Hence a single mistake can lead to a severe problem. Even if you mess up with one step of such kits, the results can be bad.
Expert’s Opinions:
The popularity of lash lifts seems to spike up each day. Especially with the limitation, we need to follow due to the pandemic. The social-distancing factor has certainly played a vile impact.
In such a situation when we all feel confined in our houses. The only thing keeping us sane is our own source of entertainment or DIYs.
The internet seems flooded with people sharing their experiences. And women are especially seen trying all the beauty and grooming DIYs.
In this quarantine, most women bought the online available lash lift kits. These kits claim to do wonders and lift the lashes as any professional would. With the use of chemical treatments, you can get those curled lashes at home.
With the price difference, many women feel compelled. This obviously sounds appealing that you can get the same thing done without paying more. But the real question arises here; are they worth trying?
Mona Gohara; a Dermatologist Explains this to Allure:
“First and foremost, at this time, we should be minimizing the number of times we touch the face,”
“Eyelids are so sensitive and the skin is so thin that the barrier can be easily compromised, leaving it vulnerable to irritation or infection. In the worst-case scenario, you could potentially damage your eyesight. This kind of product [should] be used under the supervision of a professional.”
The reason why so many experts forbade the DIY kits is that you are not proficient. Unlike experts and professionals, we lack experience and skills.
Whereas the technicians know their job and are certified for a reason. They have all the required services, staff, and equipment. The online available kits often have chemicals that are not even FDA approved.
According to the director and owner of Nouveau Lashes and High Definition Beauty. Karen Betts sated in for Professional Beauty:
“The possibility of a serious accident is extremely high, especially due to the treatment being performed around the delicate eye area.”
Apart from this even chief optometrist Luke Arundel, Optometry Australia said so. Chief agreed to the fact and stated that one must not undergo such a process. Whether it is a DIY or a professional, you must know the consequences.
Geena Gardalena is a certified New York-based licensed aesthetician. She does lash lifting for a living and is certified in Yumi Lashes application.
According to her the main ingredient in professional kits is Keratin. We all know how keratin being a protein helps with the growth and nourishment of hair. It does the same for your lashes when they remain held upwards.
Gardena Recommends:
“Technicians that are skilled in performing this service undergo months and months of training before they are certified to be able to lift lashes in the most sanitized and safe way,”
“Any little misstep in the process can damage lashes and even sight.”
DIY lash lifts could lead to infections, retinal burns, and blindness
Arundel once said that our eye is a very sensitive organ and vital to our wellbeing. So with this, he suggested completely avoiding beauty products/procedures.
Any procedure that impacts eye health can never be a smart choice. Still, if you opt for such procedures know the risks involved beforehand.
Revelist said the FDA has yet to approve the DIY lash lifts. Also, the possible risks, retinal burns, infections, and even blindness. So only a professional, fully-trained person can conduct the process.
Even though the professionals have experience there can still be potential problems. Arundel stated:
“If there is any discomfort after the procedure, any noticeable inflammation of the eyelid, grittiness, blurred vision, or loss of the natural eyelashes, you should see your optometrist immediately.”
Lash Lift Alternatives:your
Though lash lifts are what many women prefer, there are alternatives that you can explore. Here are 4 alternate, at-home options that you can use instead of DIY lash lifts. By spending a minimal amount you can get those thick lashes without any hassle.
1- Use an Eyelash Curler: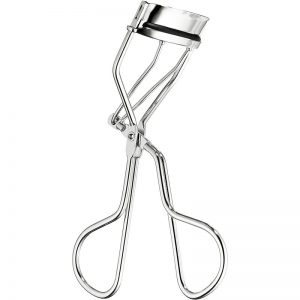
Even if you don’t have mascara in your hand, this tool can alone do the magic. Any quality lash curler can give you that instant lift you need.
The market has hundreds of high-grade lash curlers from top brands. These are not only reliable options at affordable prices. Also, a lash curler poses no harm to your eyelids or the eyes.
The calibrated hinge gives that perfect curl with uniform pressure. Neither does it pull at the lashes nor is painful so you can use it with ease.
Apart from these basic curlers, there are even heated curlers available. Isn’t it amazing? Such a curler promises a lift that would last straight 24 hours.
Most of these curlers come with a rechargeable wand and various heat settings. You can pick the one that suits you the most, for instance, low temp for thin lashes and vice versa.
Simply hold the heated wand at the base of your lashes. After 10 seconds, gently move upwards like you move a mascara wand, and voila! For best results, it’s suggested to use the curler after 1 coat of your mascara.
2- Invest in a hi-tech Mascara:
Mascaras are like one-time investments that last for months or years. Now, this completely depends on the extent of the use of every other woman.
Some of the mascaras come with dual functionalities. They work as a primer to enhance the volume and length. Then you can always buy a primer separately and apply it before the mascara.
With a single twirl of the mascara wand, your eyelashes will become fuller and voluminous. Plus, the prices are another brownie point that lash lifts don’t offer.
Not only there are so many brands that offer high-end mascaras. But these mascaras further come with specific specs to suit every woman’s requirements. So either you want a lift, luscious, or fuller lashes there is a mascara for you.
3- Try out False Lashes: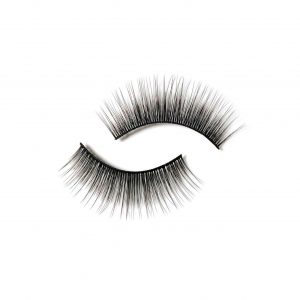
False lashes have been the oldest tool/hack to enhance beauty. For years, we have seen various trends but false lashes are still constant. The reason why people opt for these is quite simple.
Fake lashes are pre-permed, lifted, fuller lashes that you just stick on. You won’t have to curl them, use mascara, use any conditioner, etc. In fact, false lashes are the ultimate solution if you want to save time.
With such advancements made, even the false lashes got modified. Gone are the days when you had to meddle with the adhesive/lash glue.
Today, the market brings you magnetic false lashes so you can cut yourself some slack. In fact, there are some brands offering falsies with no bottom lash anchor.
Hence your upper lash won’t droop downwards all the time. Instead, such lashes come with a magnetic liquid liner to save you from any mess. So you can get those sleek eyes with fuller, voluminous lashes.
4- Consider a Lash Serum:
This last one is a bonus tip for ladies who want something natural and lighter. These lash serums come with lipids, peptides, biotin, and so much more.
All these elements ensure the growth of your eyelashes. Also, these ingredients pose no harm to your eyes. Nor do they cause any irritation or rash so you can use the serum daily.
Made with only natural elements and is free from fragrances, and parabens. The lash serum not only helps with growth but makes the lashes softer and fuller.
DIY Lash Lift Precautions:
Okay, let’s talk about what precautions you should be taking and what you should be avoiding. First off, please, if at all possible, have a friend help you with this and don’t do it alone.
While it is possible to perform a lash perm on yourself, you’d have to do one eye at a time. Moreover, it may not be as well done, and it can be risky.
This kind of high-precision work is best left to someone in a better position to work on your eyes.
Secondly, this perming solution is a very strong chemical, and working near the eyes is tricky. We would recommend some training – or at the very, very least watching some YouTube tutorials – because getting this stuff in your eyes is no joke.
Always make sure you’ve got your shields properly applied, whether we’re talking about your under-eye shields or your silicone eyelash shields.
They are absolutely essential to the process in order to protect your eyes properly.
While performing lash lifts at home may not be for everyone, it definitely can be done. Just be certain you have the right products and a certain level of necessary skill.
Whether the pros outweigh the cons, that’s up to you – there’s certainly no shame in relying on the salon for your lifts, either.

will the eye shields or any of the things u mentioned that are needed to protect your eyes, included in any of the kits?